A kitchen with a view

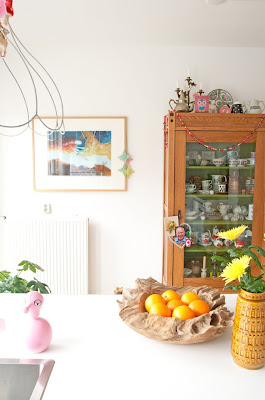
I am deeply, madly and truly in love with my cupboard. If I would be 13 and it would have a more handable size, I would take it to bed every night. In case of fire, it would be the first thing I would save…along with my Love, Molly and the rabbits…which would be quite an interesting operation.

This is the view I have from the cooking range. I don’t like cooking at all, and to be honest, you can only find me in the kitchen when there’s food to eat or if there needs to be some cleaning to do (especially when the husband has cooked there’s spatters everywhere, even on places outside a 6 feet range).

But I’m often just standing there, staring at the cupboard and it’s contents. Like I’m watching my favourite television show.

So if anyone would ever ask you if it’s possible to be in love with a piece of furniture… it certainly can. And you definitely should not feel ashamed.

So..here’s looking at you kid.

A small midnight post about the shop

(I am trying to write this post in the middle of the night, with a loudly purring cat lying on my left arm…and…
yes…
it’s already sleeping…not the cat..the arm.)

I didn’t write about the shop for ages, just because I seem to be making only Hermione’s and Little unicorn’s for my dear customers at the moment. This is, by the way, no complaint whatsoever, I love making every single Planet Fur character and especially Hermione makes me smile every time I sew her little red party hat on her sweet little head.

But last week, I was asked to make a wedding cake topper for a change. I guess it doesn’t need any explanation why it’s so nice to make a decoration for such an important day in people’s life. The groom asked if his alter ego could get a nice navy blue bowtie, matching the bouquet of the bride (and the bowtie he’ll wear on the Big Day). Of course he can! Tomorrow they’ll be flying off to their new owners, hope they’ll love ‘em.

Well, since my left arm is already asleep, I should go to bed too. Good night, sleep well and have a lovely weekend!

The Vintage Embroidery Wall-Panel Tutorial

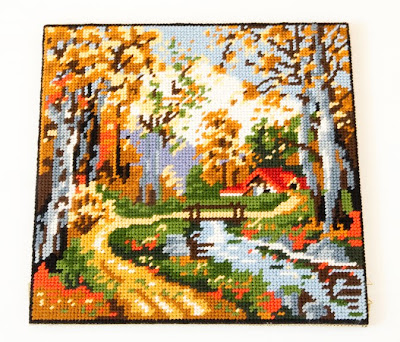
No…still ain’t got a better, shorter name for that one! But here it finally is, the tutorial which results in something like this:
This is a wall panel made of vintage embroideries, the ones I always take home with me when I find them at a thriftshop. (It always makes me sad, that all those hours of needlework end up at a thriftshop.) So, if you too have a pile of embroideries you want to join in one big piece, here we go!


You’ll need: some nice (a bit matching) vintage embroideries, some strong thread, a needle, a wooden lath and a tacker (a hammer and nails will do too). The cardboard can be used to stretch or tighten embroideries, I’ll explain that part of the project seperately.

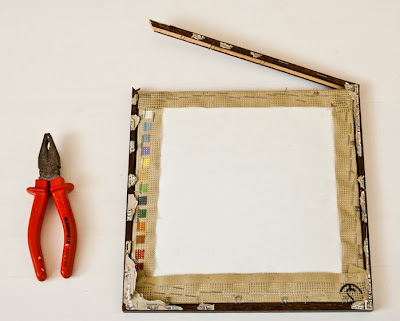
Now, let’s start with the most barbaric part of the project: getting the embroidery off it’s original frame. (I suggest you do this when you’ve just had an awful day at work, or just discovered the neighbour’s dog pooped in your front garden again…you’ll need some aggression to do this.) Tear off the cardboard at the back and remove the frame. Careful with your hands!

Like this (I even needed a pincer to remove the frame):
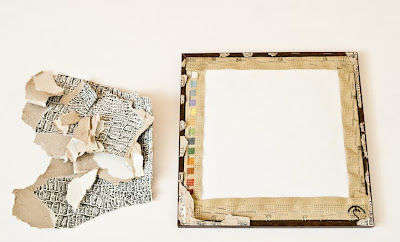
Got rid of the aggression? Good! You’ve now saved yourself a lifetime of anger-management lessons! Yay!

What you have now is a perfect, frameless embroidery. If you’re lucky, it’s already attached to a piece of cardboard, so it’ll stay in good shape when you attach it to the other embroideries. If you’re left with a floppy mess, you’ll need to tighten the embroidery with a piece of cardboard, I’ll describe that part in a second post.Arrange the embroideries. They may overlap, but the most important thing is that you’re satisfied with the arrangement. You don’t want to pass by everytime and feel annoyed (like me) because you settled for good enough ;-)

If needed, mark out the wooden lath and make it fit the width of the panel with a saw (or with your teeth, if you are The Hulk.)

Attach the upper embroideries to the lath with a tacker or with nails.
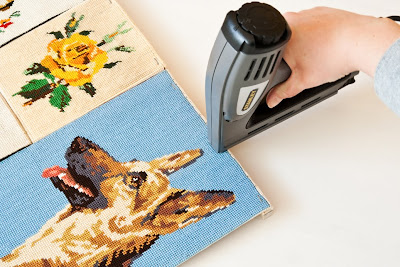
Turn the whole panel around (you’ll need to arrange the embroideries backwards, it’s a bit tricky, but you’ll manage!).
Sew the touching sides of the embroideries to the ones that are attached to the lath and to each other with strong thread and a sharp needle (be careful you won’t puncture your fingers like I did…five times).
Remember, it’s the back, you won’t see it once it’s mounted to your wall, no one will know it’s a bit messy. (I had to write this on a mirror and humm it every day before I got to this point.)
The back looks like this:


Make sure the embroideries are well tightened, they’ll need to defy gravity! That’s all, don’t make a big fuss about it, as long as it sticks together, you’re a winner! :-D
If there’s anything that’s just completely incomprehensible in this tutorial, please leave me a note. If you want to share your result, please do! Good luck!
Allow myself to introduce..myself

My creative interactive cyber guru, Diana, started along with a collegue this lovely new blog called Mamamarketing (it’s in Dutch, but the graphics are totally worth to take a peek too). I’m not a mama, but I do very much like their tips, tricks and tools about marketing a small creative business. Last week they wrote this post about the importance of introducing yourself on your website. People want to know who’s behind the posts, shop or Tweets (if you like). In short, with writing who you are, you show the actual face behind the brand.

Problem is that I’m a bit scared (you could better say terrified) to show myself here. And for what I’m reading on other blogs, a lot of people feel the same. Why is that, I wonder. It’s not like we have dinosaur scales on our skin (and if so, so what? That might get you on Oprah..heehee). Why are we so reluctant to reveal ourselves? Are we shy, modest, scared of hurdles of groupies? Do we like to have an air of mysteriousness around us?

When you think of it…
isn’t that just complete rubbish when you already sent so many details about your life into cyberspace?

So this is me then. And since I’m living on the edge now, I even added an “About Planet Fur” page to this website. Don’t feel obliged to read it. You may totally ignore it. I wouldn’t mind at all.

If you have been brave too, please share. I would love to meet face to face (well…interactive face, that is).

Covering the angles

The studio is L-shaped, so it’s difficult to cover all it’s angles in one picture. This is what I see when I walk into the room. Needless to say I love bright colors, but to avoid epileptical attacks when entering our home, I managed to paint just one wall in a bold color. I decided to use this color long before we bought the house, when I saw it in this spectacular studio. The wall is still a bit boring though (despite it’s color) so it will get some more decoration in the future.
It’s a delightful space, where me and Molly spend hours working (me) and..sleeping (she). Does your cat make tools disappear too by falling asleep on top of them…pincushions…scissors…?


Despite a huge ear infection I’ve made a start with writing the vintage needlework wall hanging tutorial (need to find a better name for it, but can’t think of a name that’s shorter and covers it’s angles too). During my quest for more needleworks for it’s pictures, I stumbled upon a (completely useless for the tutorial, but too-good-to-not-take-home-with-me) pile of these embroideries. They’re called ‘Schellekoorden’ in Dutch, have no idea what you call them in English.

The sun finally shows after weeks of almost pitch dark days. It’s quiet around the house (which could have something to do with my right ear being deaf :-)) and I’m enjoying these moments with every fiber in my body.
Must be off now though, my To Do list is screaming to me..it seems to have grown everytime I look at it.
Hope the sun shines too, where ever you are!